
Arbitrary Key & Axis Binding in UE4 with C++
[Author’s Note: A lot of this post is me whinging about UE4’s documentation while also documenting my journey to the correct answer, which is conveniently located at the bottom of the page.]
Anyone who’s spent any amount of time working with UE4 will inevitably run face-first into its dearth of documentation. This unfortunately means that developers, desperately seeking answers to apparently-trivial questions, will wind up on Epic’s Stack Overflow clone with other desperate UE4 developers. It’s hard to blame them for the wrong answers which the scant documentation leads them towards, but it does absolutely no good for anyone to enshrine them as correct.
Case in point, arbitrary button/key and axis bindings. While most people will be just fine adding their inputs to the project config and calling it a day (which is what Epic intends you to do), there’s a number of use cases for more flexible bindings (which Epic allows but doesn’t intend for you to do). Oddly enough, these are fairly trivial to do in Blueprints, so let’s start there.
Where’s the “Any” Key?
I’m quite fond of Blueprints, at least in principle.
Visual programming has a number of advantages over traditional text-based code, especially for beginners.
Done right, visual languages can (as Blueprints do) expose programmers to options they never knew were available.
Without waiting for Intellisense!
Case in point, the Any Key event:
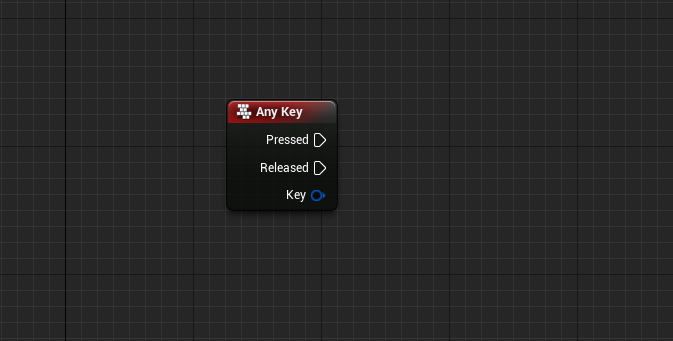
Simple and clean, accessible from a right-click search, no other weird configuration necessary. Absolutely wonderful. Better yet, any key can be read in this way. But! There’s absolutely no provided examples on how to do it in C++. Thus, the most common answers are well-meaning, awful workarounds workarounds:
void ACCharacter::SetupPlayerInputComponent(UInputComponent* PlayerInputComponent)
{
	Super::SetupPlayerInputComponent(PlayerInputComponent, character);
	PlayerInputComponent->BindAction("DetectKey", IE_Pressed, this, &ACCharacter::KeyPressed);
}

void ACCharacter::KeyPressed(FKey key)
{
	if (key.IsMouseButton() || !key.IsGamepadKey())
	{
		// this is keyboard or mouse
	}
	else if (key.IsGamepadKey())
	{
		// this is gamepad
	}
}
“DetectKey action here is a list of any possible buttons which are supported by UE4. And it was a real pain to add all these keys with hands (excepting keyboard. u can use Any Key value) in the editor.”
The absolute depravity of this answer astounds me. Simply make a list of all possible inputs! By hand! After all, computers are terrible at repetitive, enumerable tasks! *sigh* To be clear, this isn’t a dunk on “drew767”, nor am I proposing an open season on all the similar answers you can dredge up for yourself. We’re all victims of circumstance here. In fact, one such victim dug a little deeper and posted their insight:
// example.h
DECLARE_DYNAMIC_DELEGATE_TwoParams(FBindAllKeysDelegate, const FKey&, Key, bool, bKeyPressed);

// example.cpp
void UExampleStatics::BindAllKeyInputActions(AActor *Actor, const FBindAllKeysDelegate& Delegate)
{
	// Get input component from actor
	UInputComponent *InputComponent = Actor->InputComponent;
	if (InputComponent == nullptr) return;

	// Bind to all keys
	const FKey Key = EKeys::AnyKey;

	// Listen for key pressed
	FInputKeyBinding KBP(FInputChord(Key, false, false, false, false), EInputEvent::IE_Pressed);
	KBP.bConsumeInput = true;
	KBP.bExecuteWhenPaused = false;
	KBP.KeyDelegate.GetDelegateWithKeyForManualSet().BindLambda([=](const FKey& Key)
	{
		Delegate.ExecuteIfBound(Key, true);
	});
	InputComponent->KeyBindings.Add(KBP);

	// Listen for key released
	FInputKeyBinding KBR(FInputChord(Key, false, false, false, false), EInputEvent::IE_Released);
	KBR.bConsumeInput = true;
	KBR.bExecuteWhenPaused = false;
	KBR.KeyDelegate.GetDelegateWithKeyForManualSet().BindLambda([=](const FKey& Key)
	{
		Delegate.ExecuteIfBound(Key, false);
	});
	InputComponent->KeyBindings.Add(KBR);
}
(The first argument of FInputKeyBinding expects an FInputChord, but conveniently FInputChord has a constructor that takes an FKey, so you can just use that.)
A step in the right direction!
And for most people not covered by the input config route, this will suffice for their needs.
All it took was merely letting people know FInputKeyBinding exists, and so many routes open.
All it took was showing off EKeys::AnyKey, and the rest of the puzzle fell into place.
No wonky iteration, no manual wonky iteration, just understandable code.
Bonus points for showing how to declare a Delegate type, something the official documentation does, but somewhat poorly.
You can also experiment with the results of GetDelegateWithKeyForManualSet() to see what you can bind to.
Indeed, this even provides insight into what the engine itself is doing.
I’d love to live in a world where configuration is coding, but until then we’ll need imperative code to actually make the input configs mean anything.
While most developers will (understandably) stop their search there, questions still linger. Namely, “How do I do this for an axis?” So, dear reader, let’s dive a bit deeper.
How Do I Do This for an Axis?
A cursory Googling will likely lead you to the official documentation’s exceedingly helpful answer:
// Respond when our "Grow" key is pressed or released.
InputComponent->BindAction("Grow", IE_Pressed, this, &AMyPawn::StartGrowing);
InputComponent->BindAction("Grow", IE_Released, this, &AMyPawn::StopGrowing);

// Respond every frame to the values of our two movement axes, "MoveX" and "MoveY".
InputComponent->BindAxis("MoveX", this, &AMyPawn::Move_XAxis);
InputComponent->BindAxis("MoveY", this, &AMyPawn::Move_YAxis);
While that is strictly speaking an answer to “How do I bind to an axis?”, it’s most definitely not the answer you’re seeking at this point.
This is partially a confusion of terminology.
UE4 refers to both hardware axes and software axes with the single moniker “axis”, when they really shouldn’t be grouped in this way.
To make matters more confusing, there’s no distinction at the code level either.
If you knew the name of the hardware axis in question, popping it into BindAxis would yield you the results you want; likewise for BindAction.
We now have two potential paths to victory: messing around with Blueprints and messing around with the previous helpful answer. Let’s start with Blueprints.
It stands to reason, then, that there’s probably a corresponding value in EKeys, right?
We even have a name to go off of this time.
Well, maybe that only applies to keys, so let’s look at EAxis:
namespace EAxis
{
	enum Type
	{
		None,
		X,
		Y,
		Z,
	}
}
Ah, well. Not there, clearly.
Let’s take a quick perusal of the terribly formatted EKeys documentation, then.
Word to the wise: you’re better off using Intellisense here.
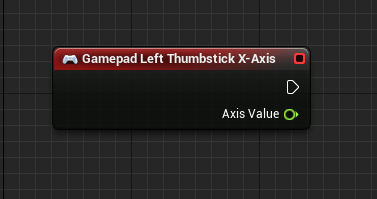
Ignoring for a second that EKeys is a struct and not an enum, you’ll probably start off by looking for “Gamepad_LeftThumbstick_XAxis” or something similar.
Not there, huh? How about anything with “axis” in the name? Unfortunately those are mostly trigger values for VR controllers.
Those of you with access to the source code (which I highly recommend you acquire, especially when working with C++) might now search it for “Gamepad Left Thumbstick X-Axis”, since it certainly has to be linked to a hardware axis somewhere, right?
You are correct, and the frustrating answer is EKeys::Gamepad_LeftX.
Why on earth it didn’t occur to them to change the enum name to indicate it’s an axis, or why they didn’t add even a single comment to it, is beyond me.
But at least we know how to reference it.
What do we do with it?
You’d probably start by changing our working key code above to something like:
FInputKeyBinding AxisBinding(Gamepad_LeftX, EInputEvent::IE_Axis);
This will not work, unfortunately.
Despite being an FKey, axes are treated as fundamentally different by the engine, so we’ll need a different approach.
Maybe you’d intuit that there’d be an axis equivalent to FInputKeyBinding, and you’re right!
FInputAxisBinding is a struct that looks very similar (it’s not; more on that later), so let’s start messing around with that.
FInputAxisBinding AxisBinding(Gamepad_LeftX);
// ...
this->InputComponent->AxisBindings.Add({ AxisBinding });
(I’m not sure why AxisBindings.Add() expects a TArray and the key equivalent doesn’t. ¯\_(ツ)_/¯)
This works, surprisingly! You’ll need to change the closure and delegate to accept a floating point value, but this will indeed give you the left stick’s X-axis value every frame. This approach does have some drawbacks, and the eagle-eyed among you may have noticed the big one already. You cannot define a scaling value with this approach. There’s no way to flip the axis’s values without doing that in your lambda or delegate. Moreover, you will need to manually accumulate the axis values yourself if you have multiple hardware axes mapped to one software axis. Nor does it handle buttons or keys acting as an axis input, like you’d expect for WASD movement. The input config can do this, though, so clearly we’re not done in our searching.
How Do I Do This for an Axis? But Properly
You may be tempted to find an equivalent to FInputChord for an axis, so I’ll spare you the short dead-ended search that yields.
There isn’t. At least not that I could find.
And honestly, even if there were, the proper approach is so much better that you’re probably better off using it anyway.
The proper approach is how the engine turns your input config into actionable (and axisable) code.
It also uses such a weirdly named construct that you’ll only find it via an Intellisense whim or by diving in the engine’s code.
I’ll spare you that search as well:
void AMyPlayerController::SetupInputComponent()
{
	Super::SetupInputComponent();

	// ...

	FInputAxisKeyMapping StickMapping("AxisName", EKeys::Gamepad_LeftY, 1.0f);
	FInputAxisKeyMapping WMapping("AxisName", EKeys::W, 1.0f);
	FInputAxisKeyMapping SMapping("AxisName", EKeys::S, 1.0f);

	this->PlayerInput->AddAxisMapping(StickMapping);
	this->PlayerInput->AddAxisMapping(WMapping);
	this->PlayerInput->AddAxisMapping(SMapping);

	// ...

	InputComponent->BindAxis("AxisName", this, &AMyPawn::Move_YAxis);
}
You can actually do this outside SetupInputComponent too, to my knowledge there’s nothing particularly special about it.
You can also name the axis (the first argument to each mapping variable) to literally whatever you want.
You can dynamically generate the name if you so desire!
You can add your own mappings to a software axis defined in the input configs!
This approach will also sum up the inputs of every key and axis you map it to before calling your bound function, and it’ll call it only once.
Since FKey is mostly just an FName with some fancy bits, you can also do this if you wanted to:
FInputAxisBinding AxisBinding("AxisName");
// ...
this->InputComponent->AxisBindings.Add({ AxisBinding });
A Brief Aside Before Closing:
FInputKeyBindingandFInputAxisBinding
It’s later now, so let’s talk about the differences between
FInputKeyBindingandFInputAxisBinding. Superficially they look like roughly equivalent types, maybe subclasses of someFInputBindingclass, mais non. Take a look at their declarations and you’ll come to that conclusion very quickly. You’ll also notice an odd distinction in their behaviors.FInputKeyBinding::KeyDelegate.GetDelegateWithKeyForManualSet()exists, whileFInputAxisBinding::AxisDelegate.GetDelegateWithKeyForManualSet()does not (the nearest equivalent isGetDelegateForManualSet().FInputKeyBindinghas that, too, and I’m unsure how it’s any different).
Moreover,
FInputKeyBinding::KeyDelegate.GetDelegateWithKeyForManualSet().BindUObject()can bind extra parameters as advertised, whileFInputAxisBinding::AxisDelegate.GetDelegateForManualSet().BindUObject()can’t? I’m not sure if this is my error or not, but in all my testing I simply could not get the compiler to accept a method with extra parameters. You can fix this by binding to a lambda instead, but the distinction is annoying and speaks to a deeper-rooted problem in how Epic approached the input system. I’m hoping UE5 is enough of a rewrite to fix this (admittedly small) problem, but I’m not holding my breath.
That’s the long and short of it. There’s a summary at the bottom for easy reference. Maybe it’s just the time I spent searching for it, but I personally find this approach very elegant, if slightly obtuse. And just imagine if the official documentation covered this as well! It’d be SEO’d to the top of the search results and (hopefully) would show how to use it too. The code isn’t even that complicated. An ounce of prevention, and all that. I’m unsure of which UE4 versions this applies to (the documentation doesn’t seem to keep its history). It’s accurate for 4.26, at least.
I’d also like to say that my ramblings here are mostly just me venting. I know full well how fiendishly complicated UE4 is, and how much more complicated it is to keep accurately documented. The fact that it runs at all is testament to Epic’s work. In an ideal world every single little feature and corner case would be perfectly documented, but I’ll gladly take publically available and decently readable code over nothing at all.
Please, Just Tell Me the Magic Words, My Family is Dying
A software axis is any axis defined in the project’s input config or via FInputAxisKeyMapping.
A hardware axis is any axis that’s mapped directly to hardware input, whether that’s a joystick or a trigger or mouse movement.
Binding to a software key or axis
InputComponent->BindAction("Grow", IE_Pressed, this, &AMyPawn::StartGrowing);
InputComponent->BindAction("Grow", IE_Released, this, &AMyPawn::StopGrowing);

InputComponent->BindAxis("MoveX", this, &AMyPawn::Move_XAxis);
InputComponent->BindAxis("MoveY", this, &AMyPawn::Move_YAxis);
Binding to any single hardware key (or any key)
// In an APlayerController subclass

FInputKeyBinding Binding(FInputChord(Key, false, false, false, false), EInputEvent::IE_Pressed);
// Key is any FKey value, commonly found in the EKeys struct, including EKeys::AnyKey
// You can also skip FInputChord altogether and just use the FKey value instead
// EInputEvent::IE_Pressed can be swapped out to IE_Released if you want the release event instead
Binding.bConsumeInput = true;
Binding.bExecuteWhenPaused = false;
Binding.KeyDelegate.GetDelegateWithKeyForManualSet().BindLambda([=](const FKey& Key)
{
	// Your code here
});
this->InputComponent->KeyBindings.Add(Binding);
Binding to any single hardware axis
// In an APlayerController subclass

FInputAxisBinding AxisBinding(AxisKey);
// AxisKey is any FKey value that could conceivably be an input
AxisBinding.bConsumeInput = true;
AxisBinding.bExecuteWhenPaused = false;
AxisBinding.AxisDelegate.GetDelegateForManualSet().BindLambda([=](float Value)
{
	// Your code here
});
this->InputComponent->AxisBindings.Add({ AxisBinding });
Binding multiple hardware keys and axes to a software axis
// In an APlayerController subclass

FName AxisName = "AxisName";	// Whatever you want the axis's name to be
FInputAxisKeyMapping StickMapping(AxisName, EKeys::Gamepad_LeftY, 1.0f);
FInputAxisKeyMapping WMapping(AxisName, EKeys::W, 1.0f);
FInputAxisKeyMapping SMapping(AxisName, EKeys::S, 1.0f);

this->PlayerInput->AddAxisMapping(StickMapping);
this->PlayerInput->AddAxisMapping(WMapping);
this->PlayerInput->AddAxisMapping(SMapping);

InputComponent->BindAxis(AxisName, this, &AMyPawn::Move_YAxis);